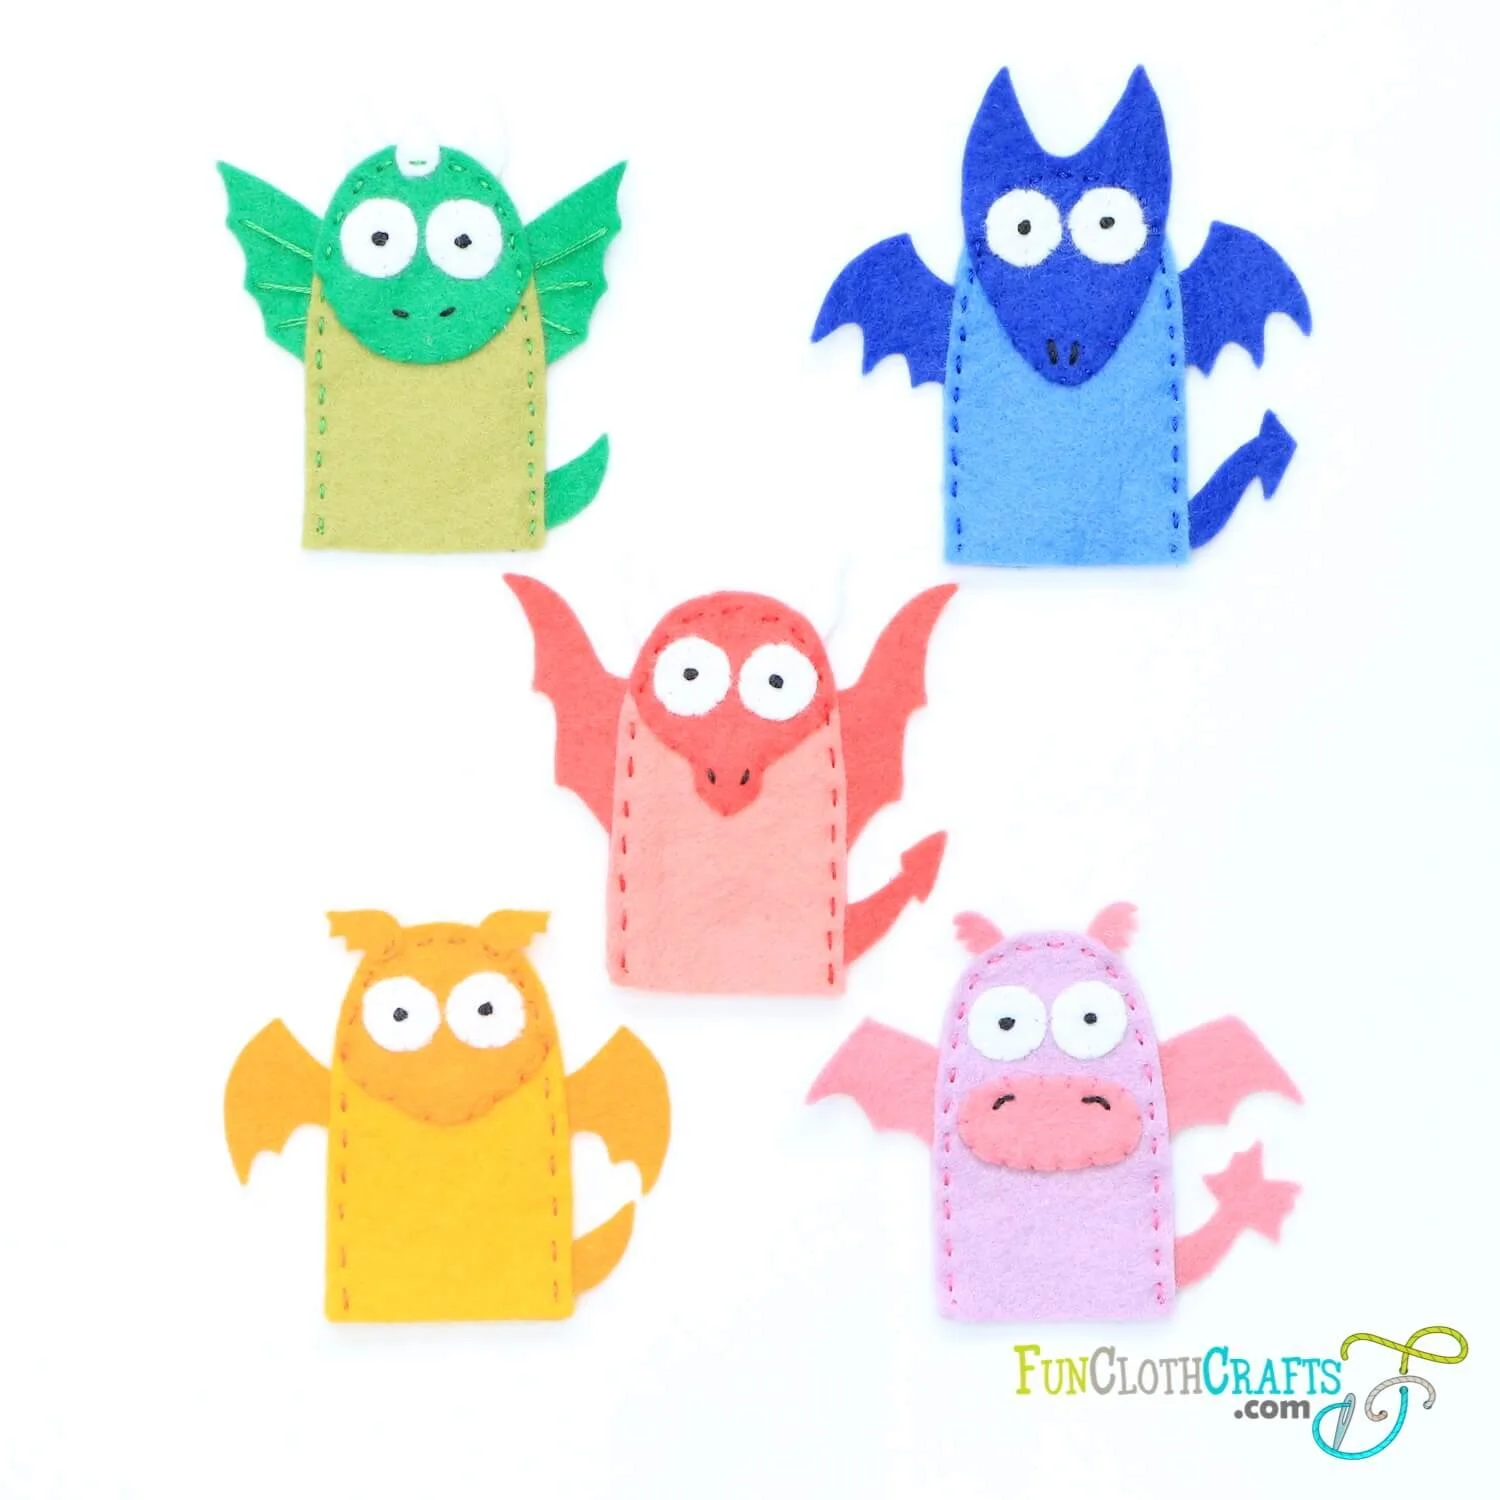
5 Adorable Dragon Finger Puppets with PDF Pattern
This post contains affiliate links, which means I may earn a small commission at no additional cost to you if you click through the link and make a purchase. For more information, click here.
Looking for dragon craft ideas? This step-by-step tutorial shows you how to make 5 adorable dragon finger puppets. It’s the next of my finger puppet projects that I enjoy a lot. Previously, I have shared free patterns for 7 woodland finger puppet animals (bear, hedgehog, fox, squirrel, frog, owl, and mole finger puppet). You can use this dragon pattern to create one or lots of DIY dragon finger puppets. These five finger puppet dragons became a birthday gift for my daughter’s friend, a dragons fan. She was flattered to receive them.
Happy crafting!
After a temporary period of two years, when this pattern was for free, it was moved to my ETSY shop. In the FunClothCrafts ETSY shop, you find finger puppet PDF patterns and felt board PDF patterns, including SVG files.
This post has been featured by Twinkl in Year of The Dragon Crafts.

General Instructions for DIY Dragon Finger Puppets
These dragon felt finger puppets are easy to make. They are stitched entirely by hand, using a running stitch, French knot, and whip stitch. Looking for a concise guide on embroidery stitches? Visit the article 9 hand embroidery stitches for felt to learn more.

Dragon finger puppets hand embroidery stitches
Step-by-step instructions follow to make DIY felt dragon finger puppets. The finished puppets are approximately 3” (7,5 cm) tall. The dragon puppets are made from scraps of felt.
Note that finger puppets are not recommended for children under the age of 3.
Three-strand, two-strand, and one-strand embroidery floss are used to embroider the dragon felt puppet. Knot thread ends on the wrong side of felt.
Tips for Sewing with Felt
TIP for holding pieces in place for sewing: Felt pieces can be pinned to the body shape to hold them in place until they are stitched.
Another option is to place a tiny dab of instant dry fabric glue on the reverse side of felt shapes and position them on the puppet’s body.
TIP for sewing with felt: Searching for more information about sewing with felt? Visit my post on how to sew felt: tips for sewing with felt.
TIP for cutting felt shapes: If you like to learn some tips on how to cut out felt pieces, you can read my post about 6 techniques for cutting felt shapes.
TIP for tracing on felt: You are welcome to read how to trace on felt post to learn more about transferring the pattern on felt for embroidery.
Materials & Supplies for DIY Dragon Finger Puppets
5 dragon finger puppets template - find the complete pattern and SVG download in my ETSY shop
felt scraps: colors you choose to make the dragon finger puppets, white for eyes
embroidery floss: matching colors to the darker tone of felt, black, white
small or embroidery scissors (KAI 5 1/2 inch Embroidery Scissors are the ones I use)
pins (optional - these are my favorites)
a glue that works on felt (optional - Elmer’s CraftBOND glue works well)
freezer paper (optional - Check out my tutorial to learn how to use freezer paper for cutting precise shapes from felt)
iron (optional - if you cut felt with freezer paper: I use Rowenta travel iron)
How to Make a Dragon Finger Puppet
Use the template from my shop on ETSY to cut out all the pieces from felt.


2. Pin or glue two white circles for eyes to the front of head shape or body shape (for pink dragon finger puppet), following the template. With one-strand white floss, sew straight stitch around the edges of the eyes to attach it.
Using the french knot, embroider the eye pupils with three-strands of black embroidery thread. I wrapped the thread 3 times around my needle so that the knot is more significant.

Use pins or dab of glue to hold the eyes in position

Embroider the eyes with 8 straight stitches

Embroider the french knot for the eyes’ pupils
3. Embroider the nostrils with three-strands of embroidery floss. Follow by sewing the head with a whip stitch to the front of finger puppet’s body.
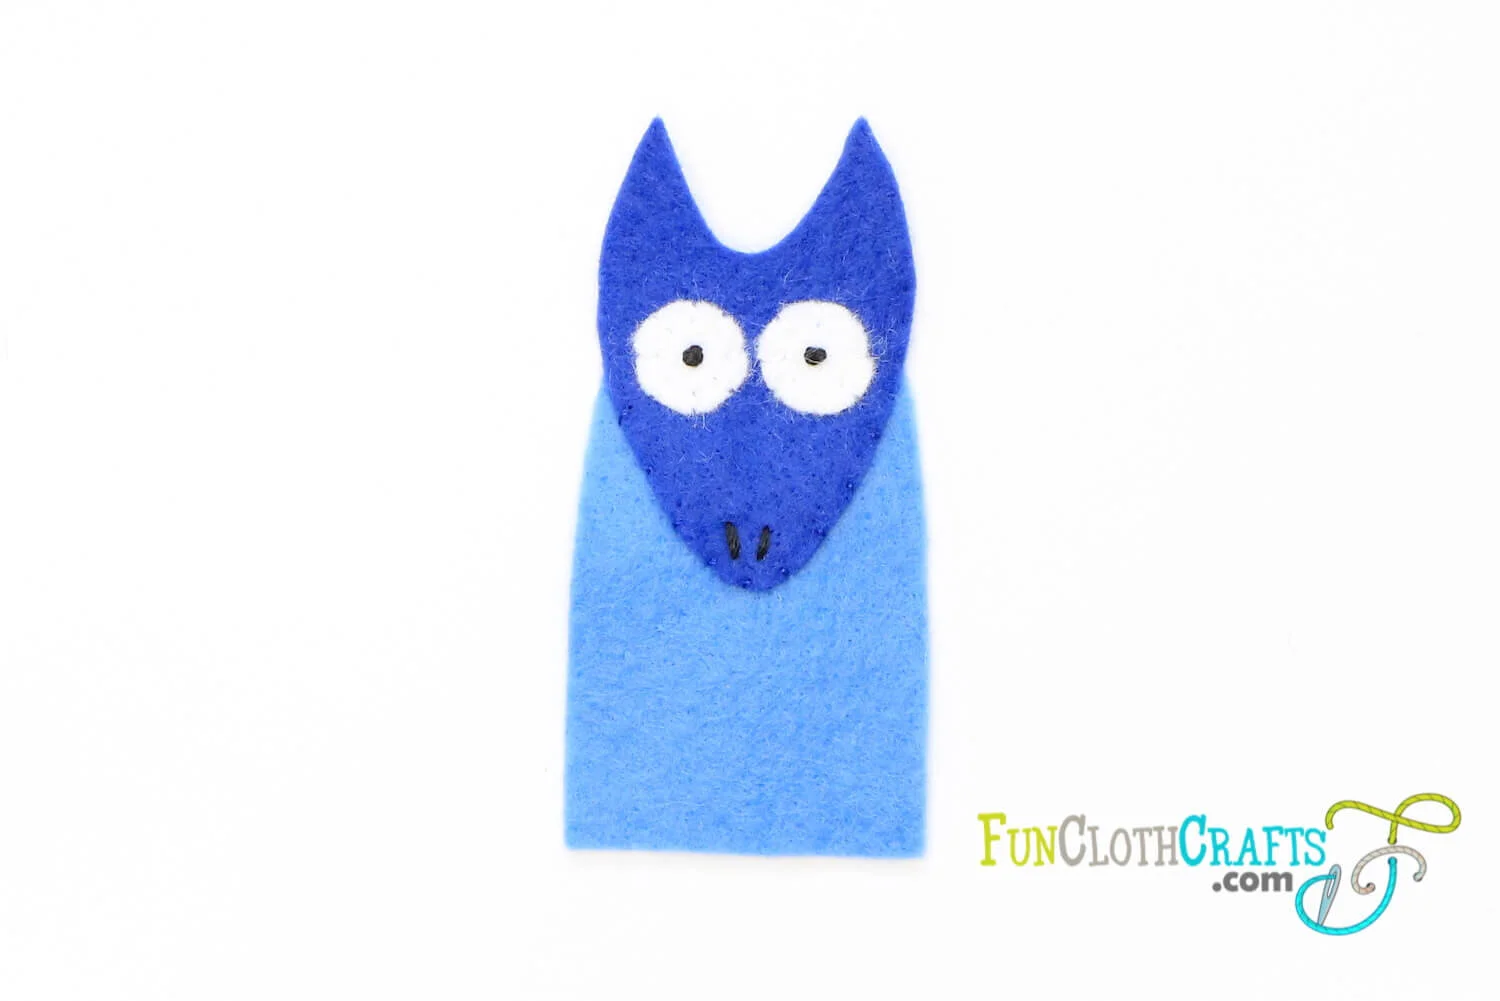
Embroider the nostrils to head and then attach head to the front of finger puppet’s body with whip stitch
4. Glue body parts (tail, wings, horns) to the finger puppet’s body.

Attach body parts (tail, wings, horns) to the finger puppet’s body)
5. Place the dragon finger puppet’s front and back together and begin joining the pieces with a running stitch close to the edge.
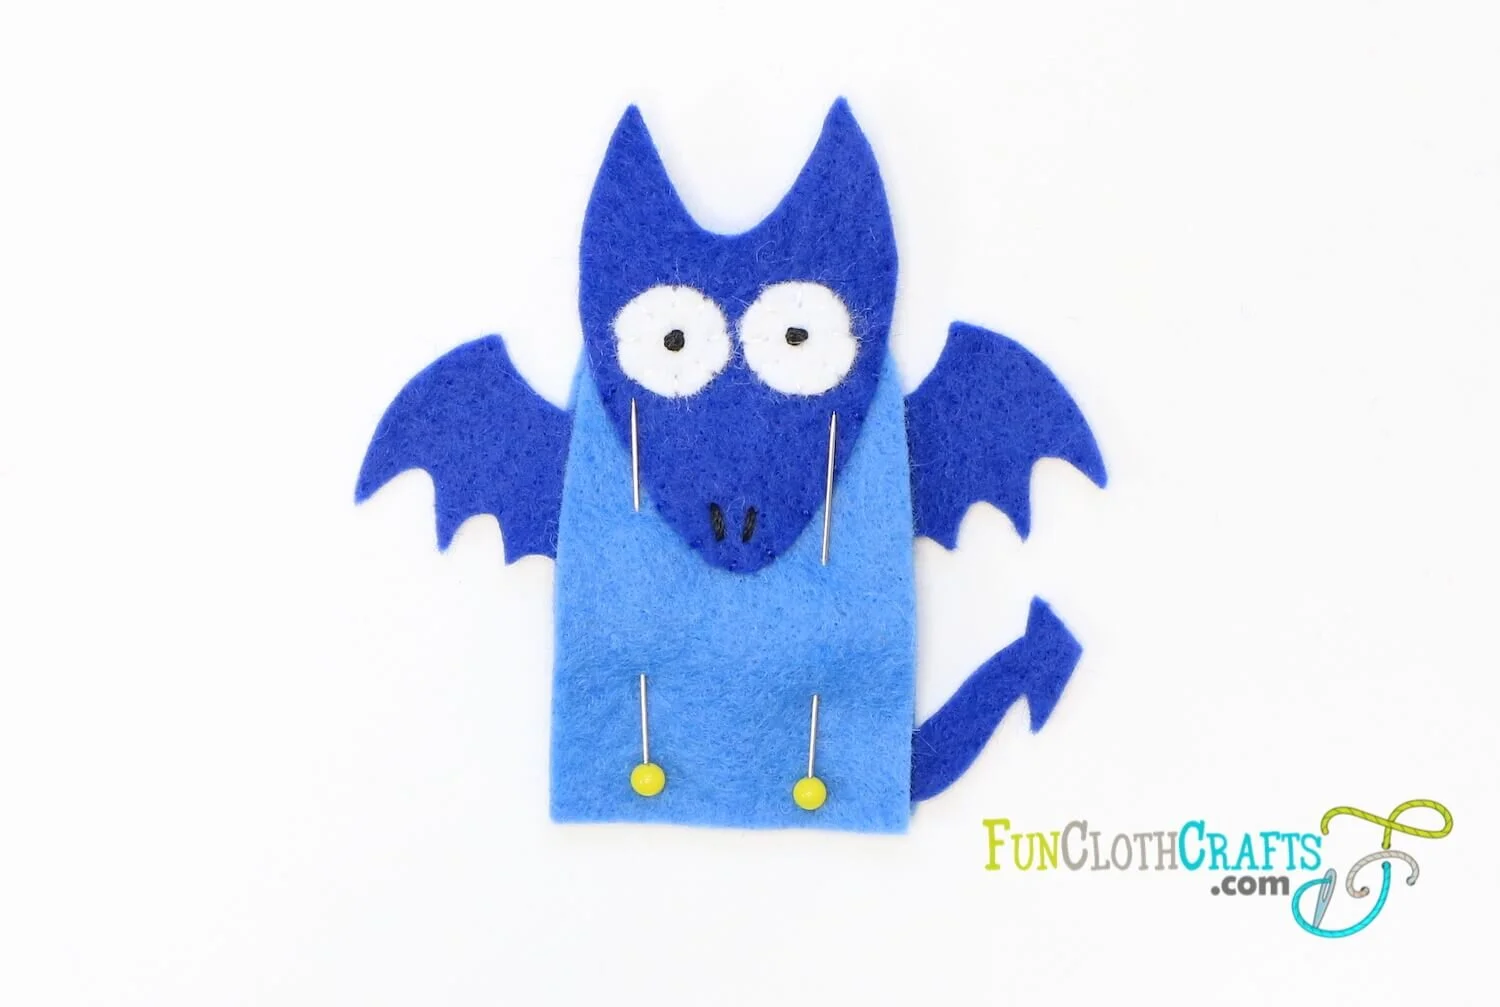
Pin dragon finger puppet’s front and back together

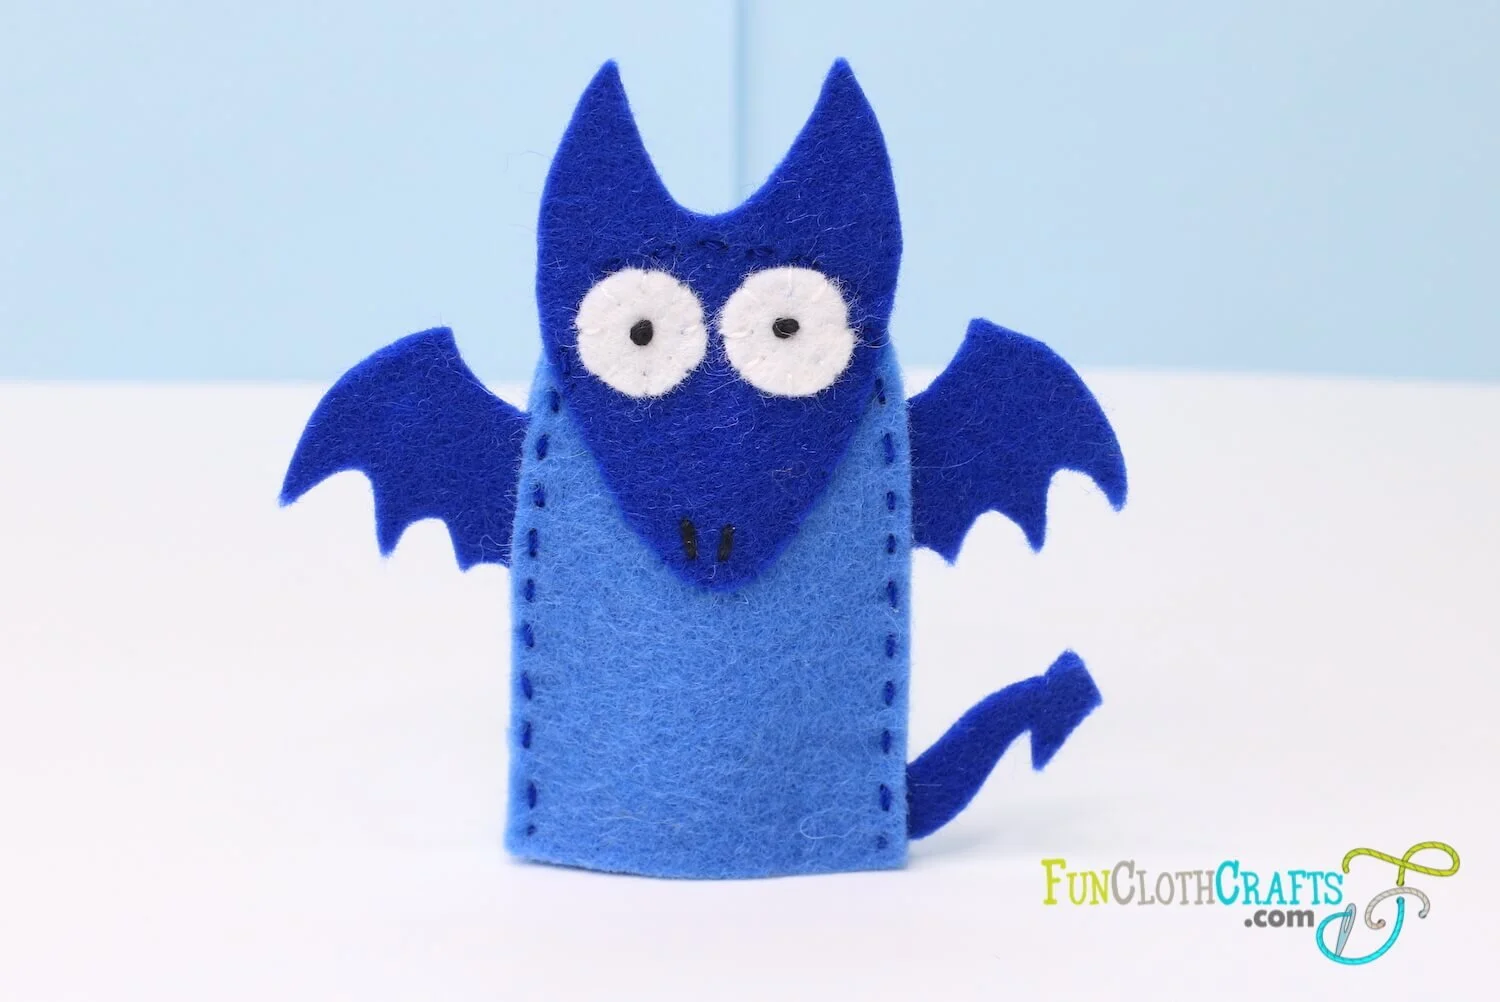
Sew running stitch close to the edge
6. Your DIY: finger puppet dragon made with Fun Cloth Crafts dragon finger puppet pattern is ready for its happy owner.

To Wrap Up
Thank you for crafting with me! I would love to see your finished dragon project. So if you like to share it, please send me your pictures. I welcome any feedback as it is important to make my products better. Don’t hesitate to contact me with your suggestions at anna@funclothcrafts.com.
Be sure to visit more on this website for free embroidery and sewing tips and tricks to help you out as you stitch my patterns. For free felt patterns visit my Freebies page.
Feel free to join my mailing list! You’ll receive updates on new patterns, the latest tips & tricks, and special promotions.
Let’s craft together!
XO, Anna