The Easy to Follow Guide on How to Whip Stitch [Tutorial]
This post contains affiliate links, which means I may earn a small commission at no additional cost to you if you click through the link and make a purchase. For more information, click here.
Learn how to whip stitch with this easy-to-follow guide. Whip stitch is used in hand sewing, knitting, and crocheting to join pieces of fabric together and create a seam. In hand embroidery, this stitch is popular for hand appliqué. When sewing with felt, you find whip stitch in many patterns. It is ideal to use when making stuffed animals, finger puppets. Want to give it a try? Have a go, going through the instructions and images below.
TIP: if you are looking for more whip stitch ideas, you may also search for the term whipstitch. It means the same thing.
Table of Content

1. What Is a Whip Stitch?
The whip-stitch meaning:
A whip stitch is a simple and versatile stitch used in sewing and crocheting. Whip stitch is an overcast stitch, which means that it is made by sewing the needle in a diagonal manner, parallel to the edge of the fabric, that helps finish edges or bind two pieces of felt together. This stitch is often used to sew the edges of fabric or to attach appliques and patches to garments.
A simple embroidery or hand sewing stitch in which the needle is passed in and out of the fabric in a series of stitches that circle an edge of the fabric. (https://www.yourdictionary.com/whip-stitch)
2. What Is Whip Stitch Used for?
The whip stitch is an overcast stitch used in sewing, knitting, and crocheting. It usually joins two pieces of fabric together. Many felt craft patterns and sewing patterns apply this embroidery stitch as it is simple, creates a durable bound seam, doesn’t add bulk, and prevents the fabric from unraveling. In hand embroidery, whipstitch is popular for appliqué. In Fun Cloth Crafts designs, I embroider the felt shapes to the finger puppet’s basic body using the whipstitch.

Finger Puppets with Free Patterns - body parts attached with whipstitch
3. How to Do Whip Stitch?
Have you ever wondered how to whip stitch by hand? I’ve done, and I am still learning. The more you practice better the stitch gets. If you don't like how the whip stitch looks, don't worry; remove the last stitch or two and repeat.
1. Whip Stitch Length and Width
Tiny whip stitches almost disappear into the felt, while larger stitches give the felt craft a more primitive look. The most common length of whip stitch is between 1/8 of an inch and 1/4 of an inch (0.3 cm to 0.6 cm). Stitch width (how far from each other the stitches are) should be matching the scale of your project. Small craft projects need small stitches, and larger crafts can have larger stitches. Note that if the stitches are too far from each other, the stuffing in felt stuffies might come out.
2. The Direction of Stitching
Try, feel and find the most comfortable direction of stitching for you. I am stitching from right to left, which is the direction you can see in this tutorial.
3. Materials and Supplies for Whip Stitch Tutorial
If you are insterested in reading the whip stitch tutorial steps without practicing, move directly to the whip stitch steps.
If you want to learn the whip stitch with me, get two same-sized squares or rectangles of felt. Next, choose an embroidery needle and floss. I used three strands of the embroidery thread to make the sewing more visible, but you can work with one strand. You can also use a standard needle and all-purpose thread. Finally, embroidery scissors or small scissors to trim your thread.
TIP: Looking for more information about working with felt, visit my sewing with felt post.
TIP: You can use a marker with disappearing ink to mark regularly the points where you want the needle to come up.
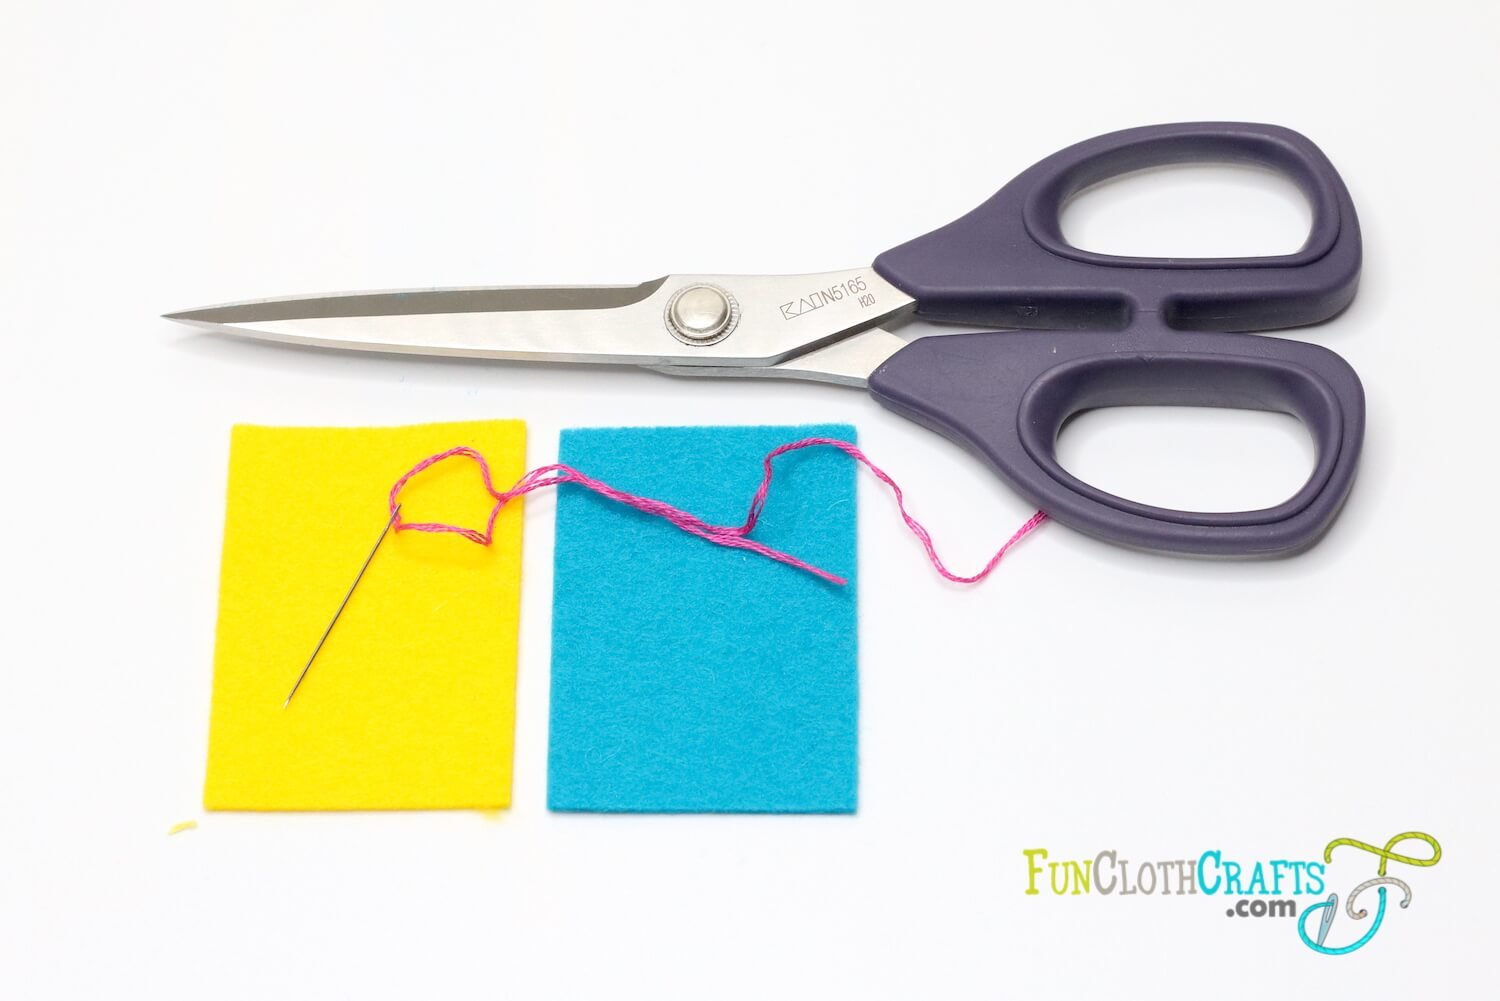
Whip stitch by hand - tools to practice whip stitch
4. Whip Stitch Tutorial Steps
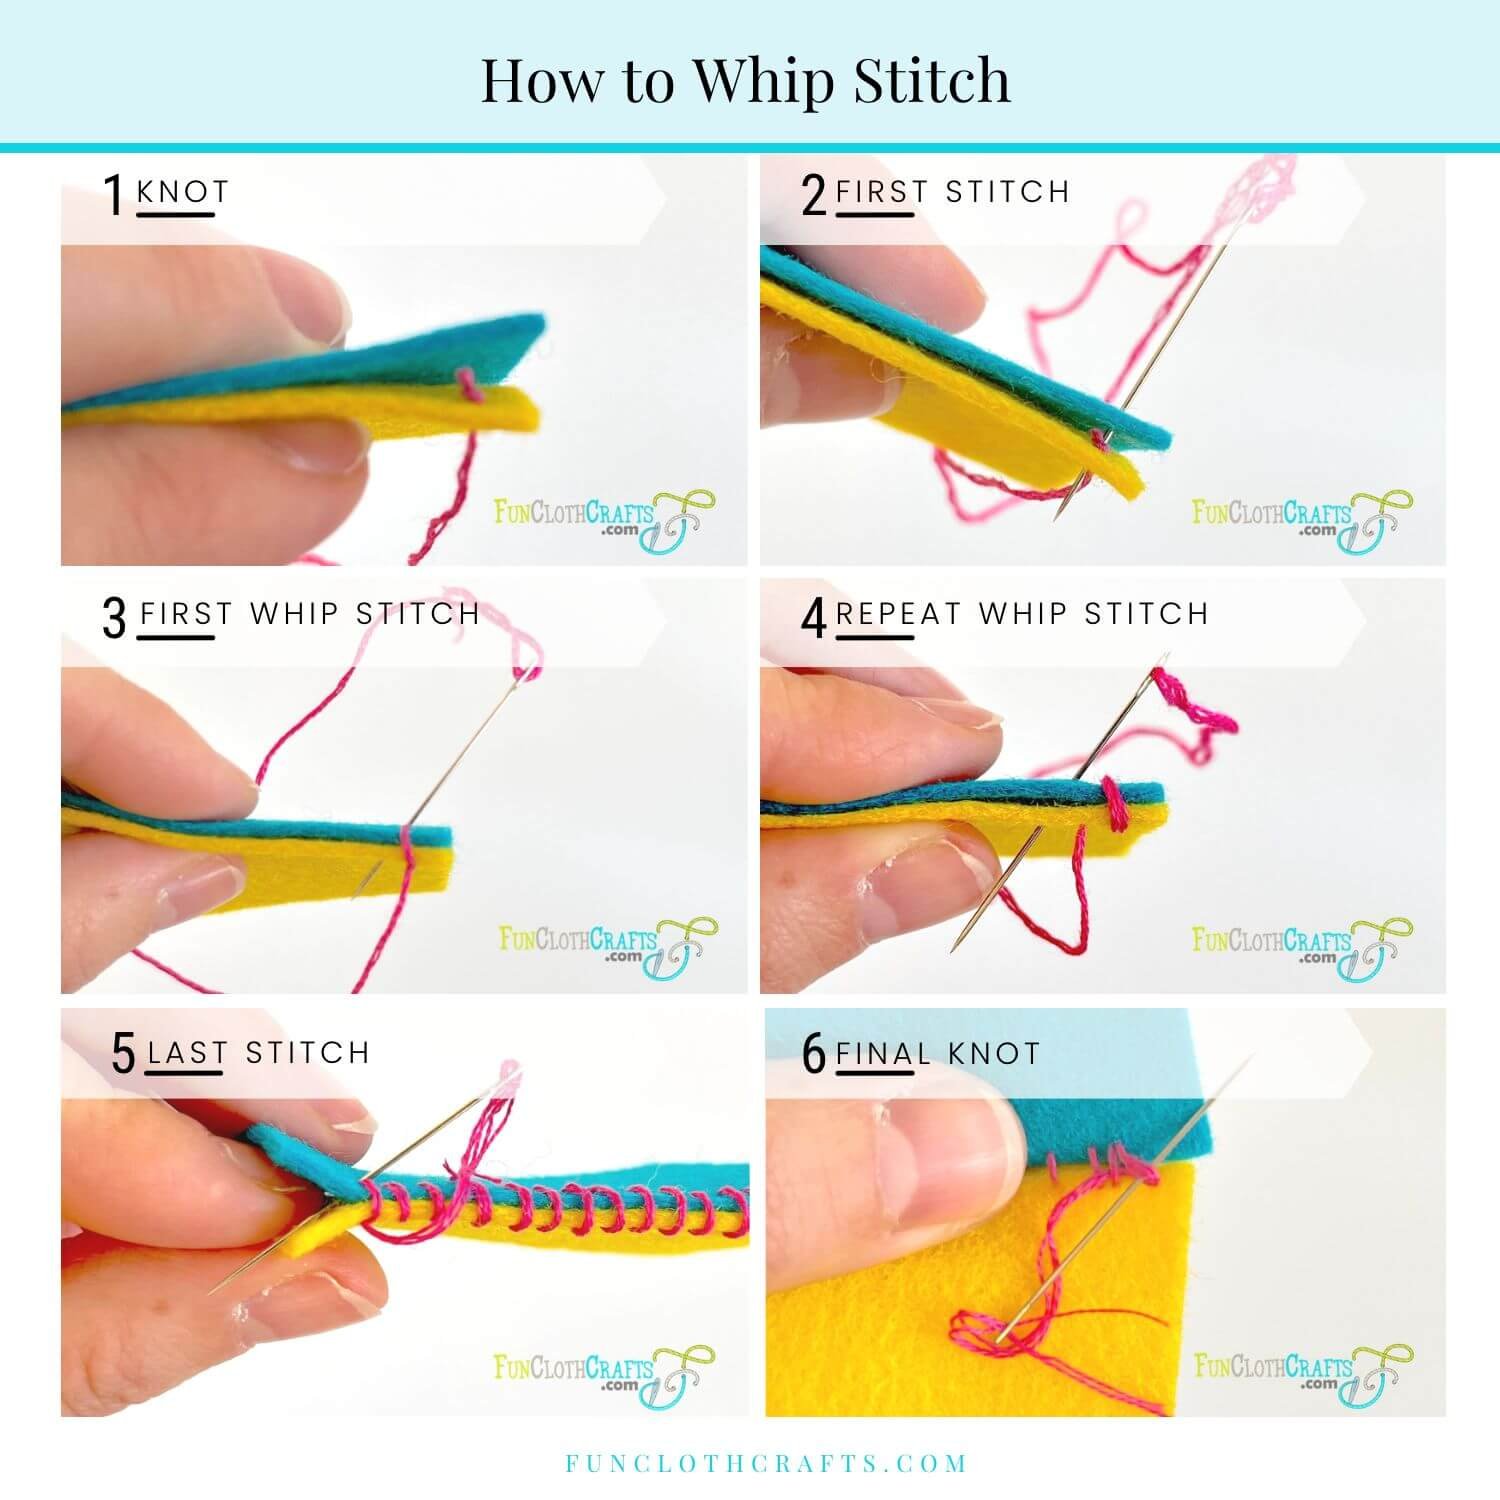
The following six detailed steps show you how to embroider the whip stitch.
Step 1: KNOT
Line up the two pieces of fabric. Begin the whip stitch by tying a knot in the end of your thread. Bring the needle through the middle of the two felt pieces up to the top layer. This way, the knot is hidden inside the felt craft you are making.
Step 2: FIRST STITCH
Make the first stitch by going around the felt and poking the needle up through both layers of fabric in almost the same place as in step 1. By doing so, the thread is wrapped around the edge of the fabric in a first stitch.
Tip: the stitches should be close-fitting but not too tight.
Step 3: FIRST WHIP STITCH
Go around the felt edge again and poke the needle in the same place as step 2. However, bring the needle up diagonally next to your first stitch this time. Note that this stitch covers the first stitch as a result.
Step 4: REPEATING WHIP STITCHES
Go around the edge of fabric and poke the needle in the fabric directly under where the thread is coming up at the end of STEP 3. Angle the needle so that the thread comes up through the fabric next to the last stitch at the same distance as the previous step. The result should be a whip stitch parallel to the first stitch.
Keep repeating step 4 until you reach the end.
Step 5: LAST STITCH
When you’ve sewn all around the edge of the felt, make the final stitch. Come up at the same place as the previous stitch rather than angled off to the side. Then, go again around the edge of the fabric and insert the needle through the backside but only through one layer of felt. Your thread is now in between the two layers of felt.
Step 6: FINAL KNOT
To make the final knot, you may need to separate the two fabrics a little to see the backs of the stitches you made. Make a loop around the inner seam and create a knot. You can now cut your thread.
If you cannot separate the two fabrics take the thread underneath the last stitch between the two layers of fabric. Make a loop and take your needle back through the loop and tighten. This creates the knot. To hide your knot and extra thread, push your needle between the two fabrics right by the knot and out one side. Pull the extra thread all the way through. The knot will be pulled inside too. Now snip off the thread close to the felt. The end of the thread will slip inside, so you won’t see it.

Whip stitch by hand
4. Whip Stitch Hem
Whip stitch can be used as one of the hemming stitches.
What is hem? The hem is the edge of fabric or clothing that has been folded under and sewn. The stitching is done along the border in a straight line.
How to do the hem with whip stitch? First, feed the needle from inside the folded hem just below the fold. This hides the knot in the folded fabric. Next, bring the needle through all the layers of fabric to the front near the edge of the hem. Continue whipstitching until reaching the end. You can watch the beginner video tutorial from Rokolee DIY to learn more about how to hem using the whip stitch.
5. Whip Stitch Applique
Whipstitch is a popular stitch for appliqué, especially when working with felt. By applique, we mean attaching a smaller piece of fabric to a larger piece of fabric to make a design. The technique is very similar to the whip stitch for joining two pieces of fabric together written above.
TIP: The thread length should be 4-5 times the length of the edge of the applique.
STEP 1 KNOT: Attach or hold the applique in place. Begin the whip stitch by tying a knot at the end of your thread and bringing the needle through in between the applique and felt. This way, the knot is hidden below the applique. You can also come up from underneath the fabric, leaving the knot below felt. Come up close to the edge of the applique.
STEP 2 WHIP STITCH: Make the first stitch by going straight to the edge of the applique and taking the needle down to the underneath of felt. The stitches can be done almost straight or in a diagonal direction. Then, come up from underneath the felt through the applique and felt in at about 1/4 inch from where you made the first stitch. The distance depends on you and the felt applique you are making. Repeat these steps until finished.
STEP 3 FINAL KNOT: To make the final knot, sew the last stitch going underneath the felt fabric at the edge of the appliqué. Then finish by making the knot.

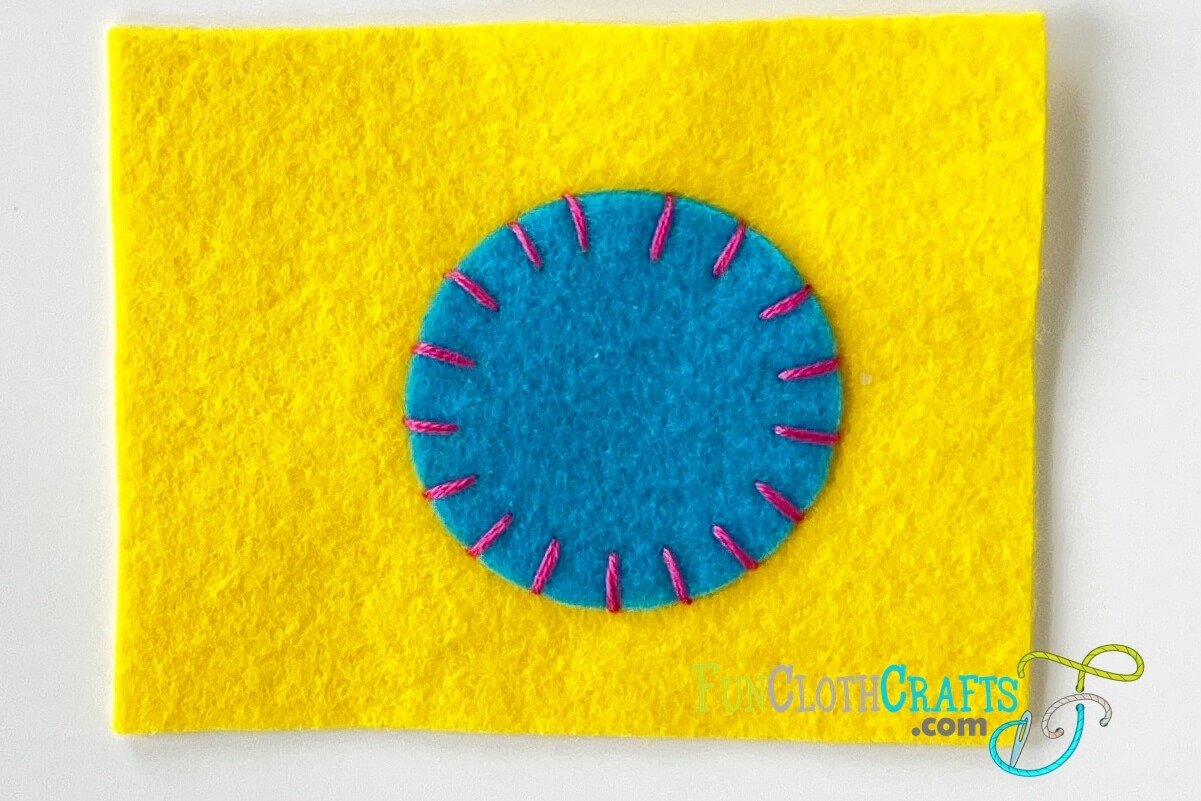
Whip stich appliqué

Mermaid finger puppets PDF pattern - Hair is sewn with whip stitch and almost invisible on the backside
6. Whip Stitch versus Blanket Stitch
Whipstitch and blanket stitch are hand-sewing stitches that help finish edges.
The Whip stitch is often used in felt crafts as it is simple, creates a durable bound seam, doesn’t add bulk, and prevents the fabric from unraveling. It is popular in felt stuffies as it almost disappears.

Whip stitch benefits:
simple and fast stitch
flat seam
prevents the fabric from unraveling
almost invisible when using matching thread
Whip stitch drawbacks:
not always evenly spaced out and straight
might become uneven near the end of work
if stitches are too far from each other, stuffing might come out
Compared to the whip stitch, the blanket stitch not only finishes the edge but also gives it a decorative touch.
Blanket stitch benefits:
masks uneven edges and wonky cuttings as it creates a thread outline
decorative stitch
simple stitch and easy to learn
Blanket stitch drawbacks:
needs more practice
ridged seam
creates a more significant and obvious seam
While the whipstitch and blanket stitch are used most often in felt appliqué when attaching felt shapes to the background felt, there is no limit to the type of stitches you can use. Stitches such as the back stitch, running stitch, stem stitch, cross stitch and many, many more can be used not only decoratively, but to attach your felt shape to its background.

Whip stitch vs. Blanket stitch
7. Whip Stitch versus Running Stitch
Whip stitch and running stitch are hand-sewing stitches that help sewing seams.
The Whip stitch is used a lot in felt crafts as it is simple, creates a durable bound seam, doesn’t add bulk, and prevents the fabric from unraveling. It is popular in felt stuffies as it almost disappears.
Running stitch is the simplest stitch. Therefore, it’s a great stitch for beginners and kids’ crafts.

Whip stitch benefits:
simple and fast stitch
flat seam
prevents the fabric from unraveling
almost invisible when using matching thread
Whipstitch drawbacks:
not always evenly spaced out and straight
might become uneven near the end of work
if stitches are too far from each other, stuffing might come out
Compared to the whip stitch, the running stitch can only join two fabrics that do not fray. Both stitches are fast and straightforward.
Running stitch benefits:
decorative stitch
the simplest stitch and easy to learn
easy to correct
Running stitch drawbacks:
doesn’t prevent the fabric from unraveling
gives a primitive look
quickly untangles if snapped
Running stitch is popular among felt crafters for felt applique. The whipstitch will be your choice if you don’t want to see the stitches, running stitch, or blanket stitch to give it a decorative look.

Running stitch vs Whip stitch

8. Whip Stitch Tutorial Conclusion
The whipstitch is a simple, fast stitch that helps finish edges or bond two felt pieces together. It's used in embroidery, knitting, and crocheting. In felt crafts, you most commonly find whip stitch in felt stuffies and felt applique. Whip stitch, blanket stitch, and running stitch are stitches that help finish edges. While whip stitch almost disappears, blanket stitch creates a decorative look.
Thank you for reading! What are your thoughts? Let me know if you find this article useful and share any tips of yours! It’s going to help a ton if you share the post on social media.
Enjoy the felt crafting time :)
Feel free to join my mailing list! You’ll receive updates on new patterns, the latest sewing tips and tricks, and special promotions.
Let’s learn together!
XO, Anna