How Do You Make an Easy Felt Board (Flannel Board)? [Tutorial]
This post contains affiliate links, which means I may earn a small commission at no additional cost to you if you click through the link and make a purchase. For more information, click here.
Making a felt board is an easy and rewarding project. It can be used for educational purposes, such as teaching children about shapes and colors, or for creative playtime activities. With just a few simple materials, you can make your own felt board in no time. This tutorial helps you to know how to make your display board and what materials to use for the flannel board.
Remember to check out the links for free and paid felt board patterns at the end of this post. Also, be sure to take advantage of my free templates.
1. What Is a Felt Board?
A felt or flannel board is a board covered in felt or flannel. It can also be just a large piece of felt attached to the wall. The Felt board is meant for preschool and young school-aged kids, so approximately kids ages three to eight.
How does it work?
First, you have the board and felt shapes prepared for the felt play. Then, your kid places felt pieces on the board that adhere without adhesive. After that, they can easily remove them and place them on the board again to create a new story.
The felt board play is ideal for preschoolers! After putting together your felt board, the possibilities are endless. It can be utilized to retell or narrate stories, create pictures, or learn about shapes and letters. In addition, the little one can explore the felt pieces' color, shape, and texture. All you need to make this learning through-play resource is some felt material, scissors, and a little spare time!
Benefits of felt board play:
Development of fine motor skills
Hand-eye coordination
Encouraging imagination
Learning new vocabulary
Improvement in memory skills
Communication and working together (when used in class)
Learning concepts such as early numeracy (counting, sorting, matching, etc.)
Gaining experience in problem-solving, organization, cause and effect
Spatial perception and exploration
Supporting visual literacy
2. Types, Sizes, and Colors of Felt Boards
Felt boards are so versatile and easy to make! You can hang them on a wall for vertical play or make them for the floor, table, or lap activities (suitable for traveling, too).
Types of Felt Boards
For those who want something accessible, wall felt boards can be hung on the wall and used by multiple children at once. On the other hand, floor- or table-top felt boards are great for solo play. They are smaller and easy to move around. Lap play felt boards are ideal for individual play and travel; they fold up easily, making them ideal for car rides or trips to the park. They are lightweight, compact versions of regular-sized felt boards, which make taking them with you on vacation or even just to Grandma’s house effortless!
Sizes of Felt Boards
Felt boards come in a variety of sizes depending on their purpose.
Wallboards are typically bigger and range from small enough to hang in a kitchen to large enough to fill up an entire wall. In kindergartens, a larger felt board is ideal so that more kids can play at the same time. Common sizes: 1.6x2.3 ft. (50x70 cm), 2x2.5 ft. (60x75 cm), 2x3 ft. (60x90 cm), 3x5 ft (90x150 cm).
For floor or table play, the felt board is smaller as it’s meant for individual play and should be rather easy to move around. Standard sizes: 12x16" (30x40 cm), 16x20" (40x50cm)
The travel board will be folded or rolled, so it’s easy to bring along wherever you go. Common sizes: 9×12” (23x30 cm), 12×18” (30x45 cm). Here you will find an easy tutorial on how to make a travel board.
Of course, depending on your needs, you can make whatever size works for you best. The above is just a guidance.
What color does the felt board have?
The most popular colors are blue and green. However, you can also come across black or white flannel boards. A combination of two colors is also possible, for example, two shades of blue or green and blue.
Black is used for visibility and contrast. In some felt stories, blue could mean the sky or the color of water and green color of grass or landscape.
Choose the color that you feel is the best for your storyboard.

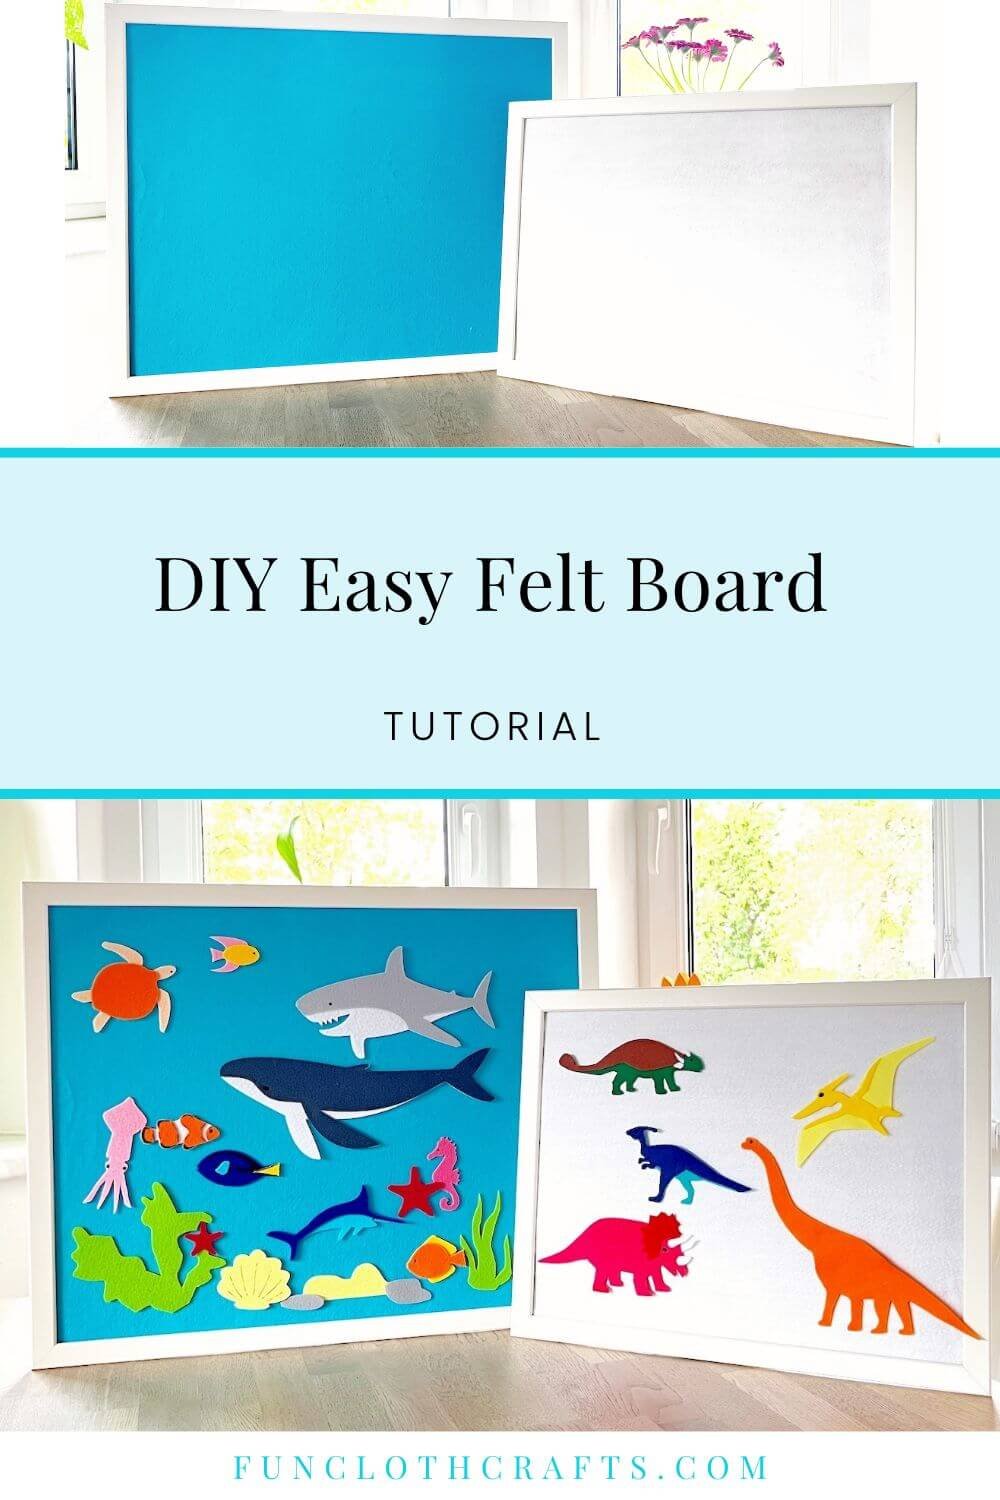
DIY Felt Board with Blue and White Color
3. What Do you Need to Make a DIY Felt Board?
Backing (for example, cardboard, foam board, thin plywood, canvas, cork board, picture frame, plastic frame). You want something that can withstand kids playing with it.
Felt by the yard about 1-2 inches (3-5 cm) larger than your board. It's also possible to use flannel (see below why)
Hot glue gun or Stapler (some adhesive that will attach the felt to your backing)
Scissors or Cutter knife - sharp scissors to cut your felt
4. DIY Felt Board Tutorial
1. Generic Tutorial on How to Make your Own Felt Board
Prepare materials and tools for your felt board (board, felt, hot glue gun, or stapler)
Get your board (cardboard, foam board, thin plywood, canvas, cork board, picture frame, or plastic frame would work for the board).
Lay the piece of felt or flannel on the ground and place your board on top. There is no right or wrong side to felt.
Mark and then cut a piece of felt or flannel slightly larger (1 or 2 inches) than your board. You can also combine felt colors if you like (green and blue, two different shades of blue, etc.).
Fold the felt or flannel over the board, and hot glue or staple the edges of the felt down, making sure to pull the fabric slightly. Work opposite sides when gluing (top and bottom and then the sides) so that you don’t pull it out of shape. You may need to trim fabric corners to get a good fit.
TIP: You can decorate the felt board with a ribbon, foam strips, and other decorations to give it a unique look.
2. DIY Felt Board with IKEA Fiskbo Frame
This is my favorite, as I like the look of the frame around my felt board.
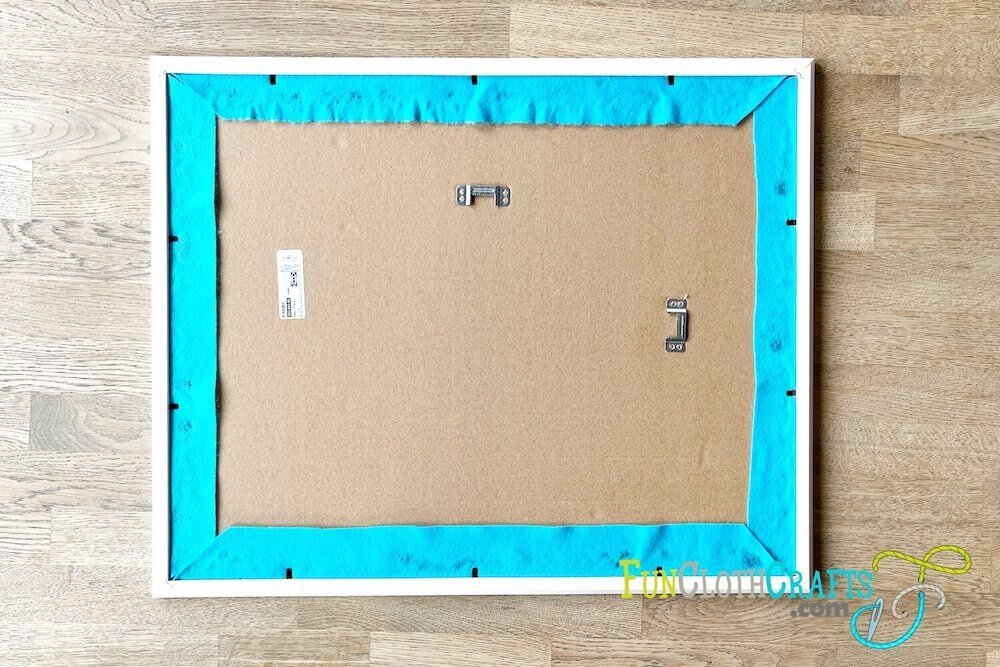
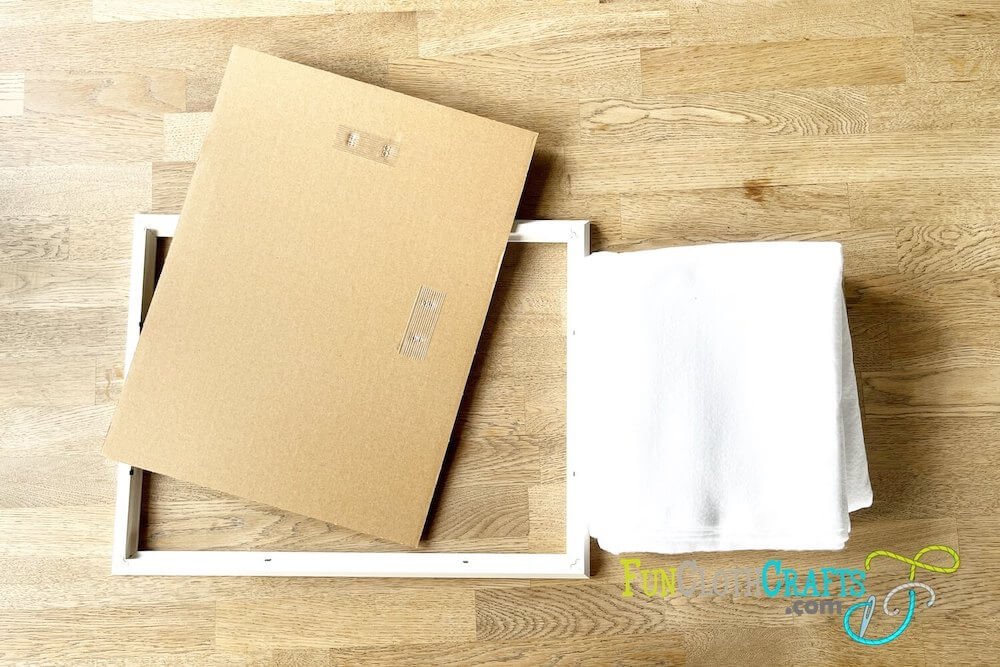
Remove Packaging, Plastic, Paper, and Cardboard from the Frame - Start by removing the packaging. Then open the clips to remove the plastic cover, paper, and cardboard backing from your frame. Next, from the plastic support, remove the protective plastic on both sides.
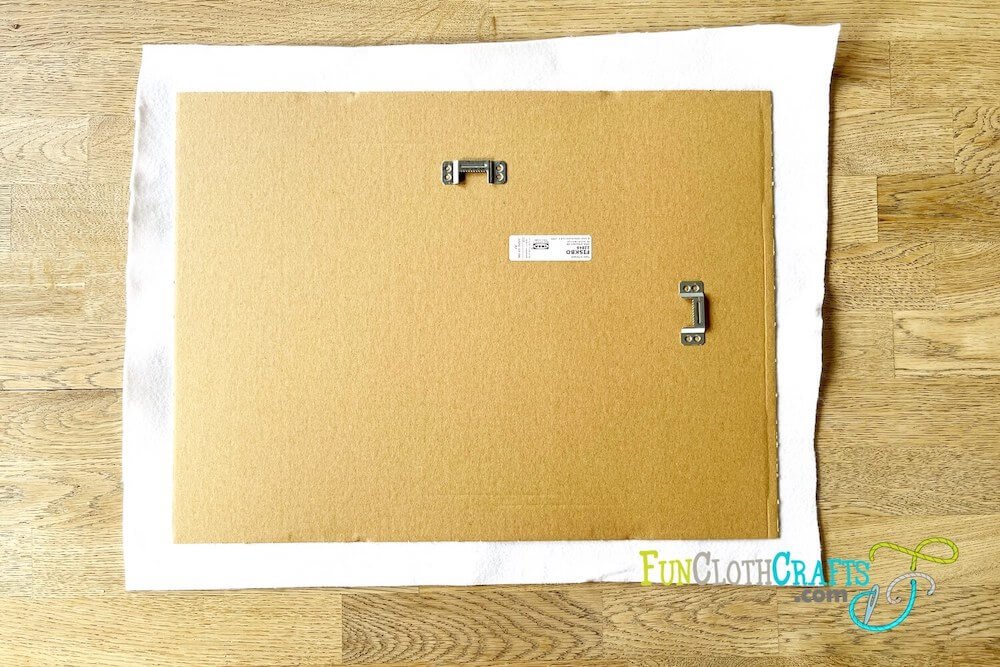
Cut Felt to Size - Use sharp pair of scissors to cut felt down to size. The cut felt piece should be about 1 inch larger on every side than the cardboard.
TIP: the felt doesn’t have to be cut perfectly, as the edges will be hidden at the back of the cardboard.
Glue Felt to Cardboard on Two Opposite Sides - Center the plastic and cardboard on top of your felt board (plastic facing the felt, then add the cardboard). Next, apply hot glue on two opposite sides of overhanging felt. Then fold the felt onto the cardboard and press firmly to make it stick.
Note: I decided to keep the plastic backing in to make the backing more sturdy. So the layers are as follows: felt, protective plastic, and cardboard.
Cut Corners - With your scissors, cut off the excess felt in each corner. This ensures that there is no bulk felt in the corners.
Finish Glueing Felt to Cardboard - Apply hot glue on the remaining two sides of felt. Then fold those over and press them onto the cardboard.
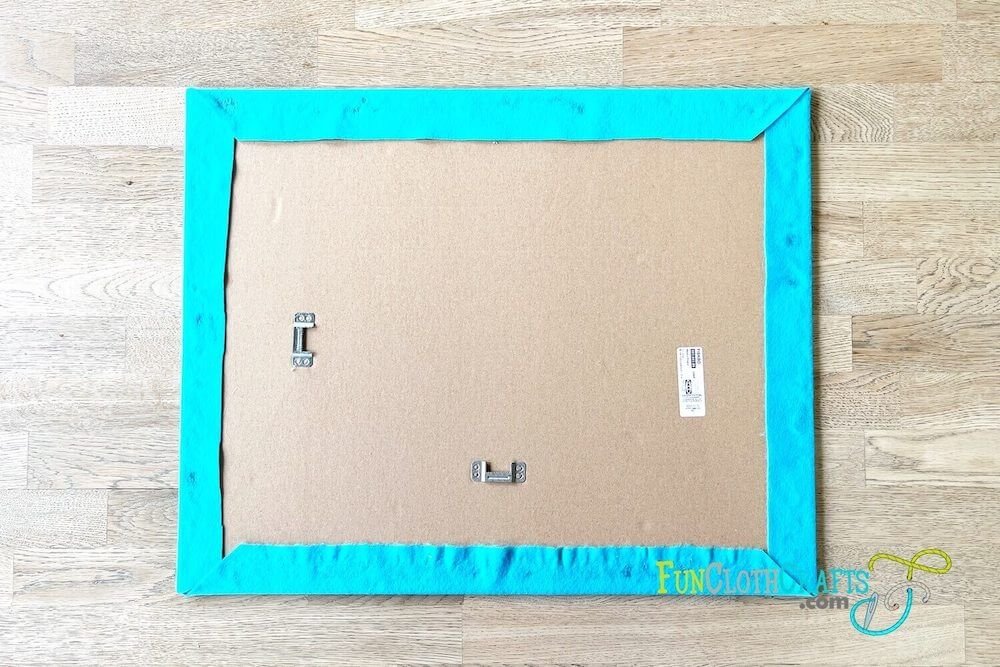
Place Cardboard with Felt in the Frame - Once your felt adhered, pick up the felted cardboard backing and gently press it back into the frame. Secure it properly with the clips.
Your framed felt board is ready to use!
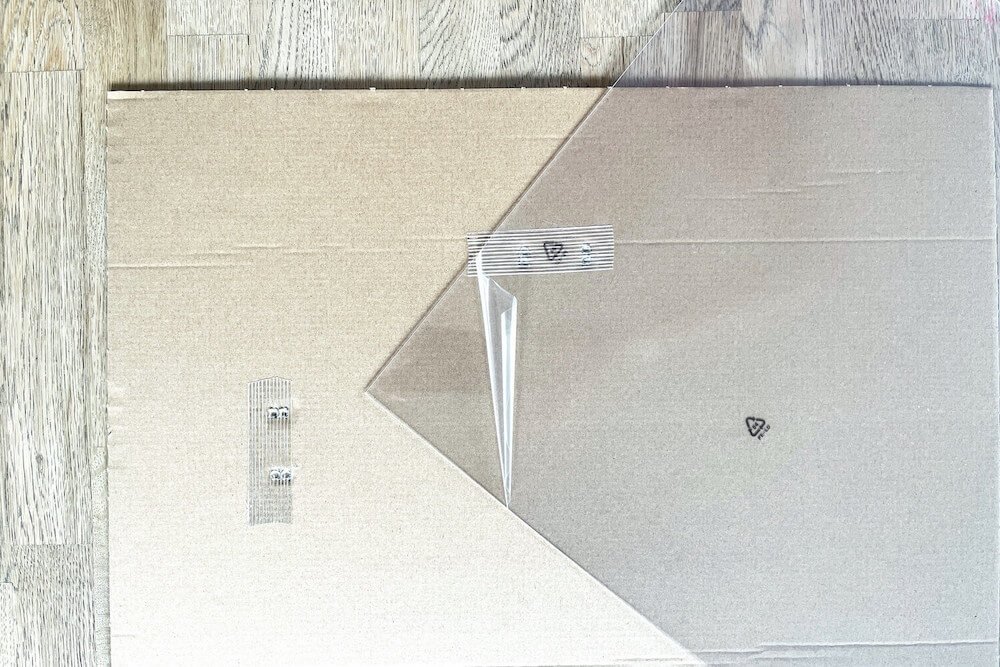
STEP 1 - Remove the packaging, take out the cardboard and protective plastic, and remove the plastic cover on both sides
STEP 2 - Cut felt to size, about 1 inch larger than the cardboard
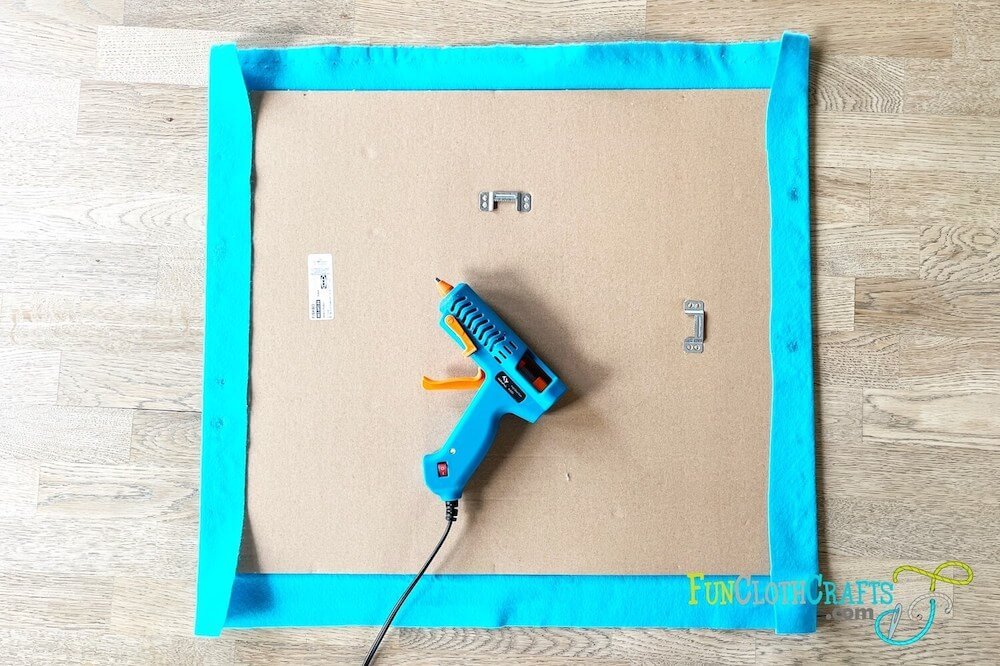
STEP 3 - Glue felt to cardboard on two opposite sides
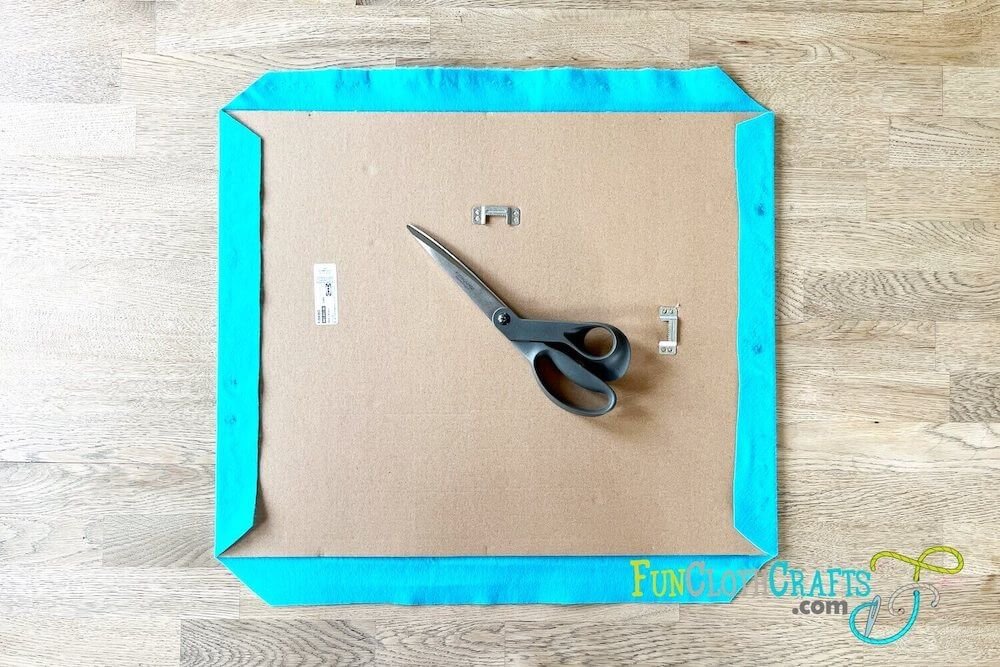
STEP 4 - Cut off excess felt in each corner
STEP 5 - Finish attaching the remaining two sides of felt with hot glue gun
STEP 6 - Place cardboard with felt into the frame and close the clips
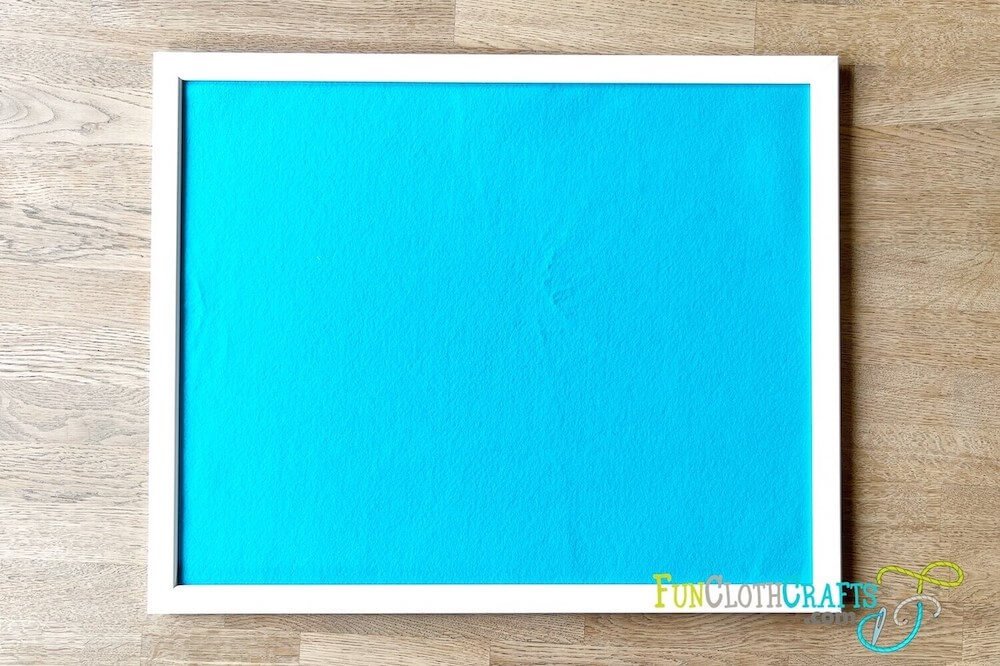
DIY Felt Board
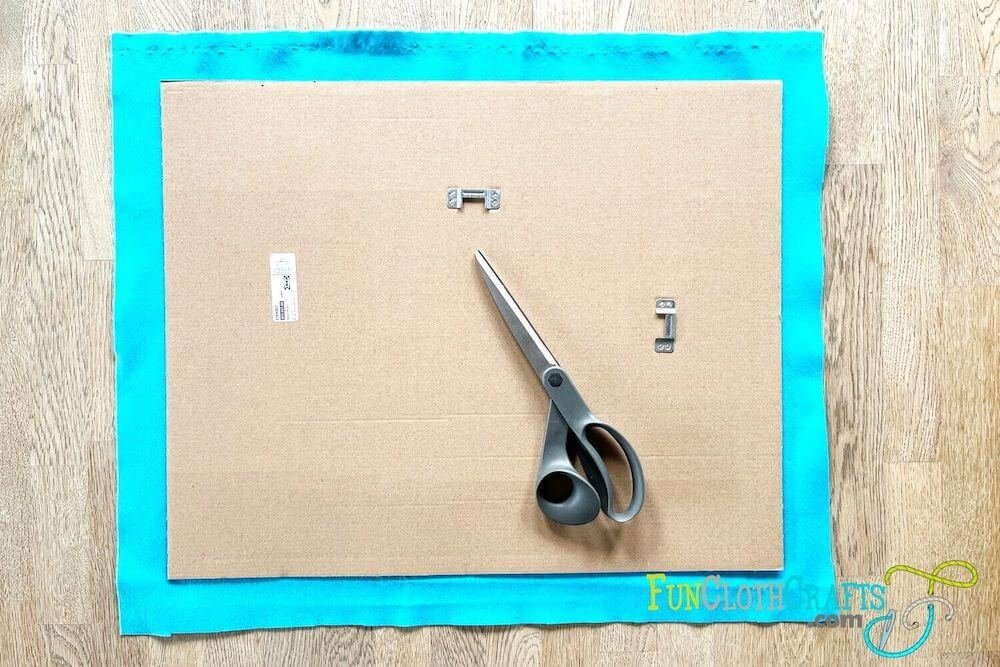
3. Felt Board with Picture Frame and Mod Podge Glue
I’ve also tried to glue felt directly to the IKEA Fiskbo frame cardboard (using Crea Patch Glue, similar to Mod Podge). As the cardboard is too thin, the cardboard started to warp and stayed that way :( Therefore, I prefer the previous method of making the felt board.
Remove Packaging, Plastic, Paper, and Cardboard from the Frame - Start by removing the packaging. Then open the clips to remove the plastic cover, paper, and cardboard backing from your frame.
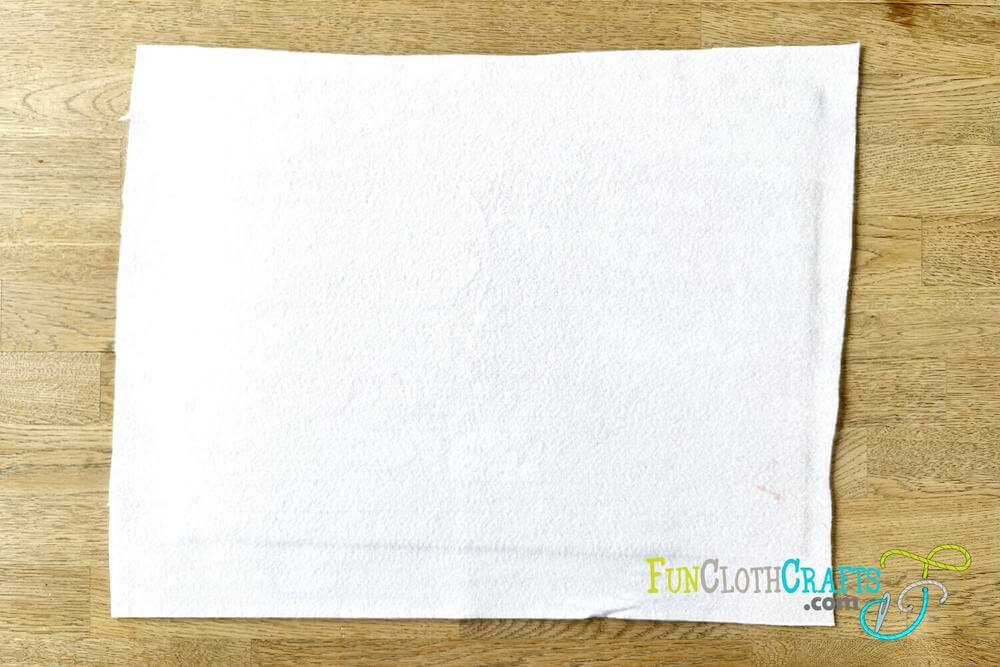
Cut Felt to Size - Use sharp pair of scissors to cut felt down to size. The cut felt piece should be about 1 inch larger on every side than the cardboard.
TIP: the felt doesn’t have to be cut perfectly, as the edges will be hidden at the back of the cardboard.
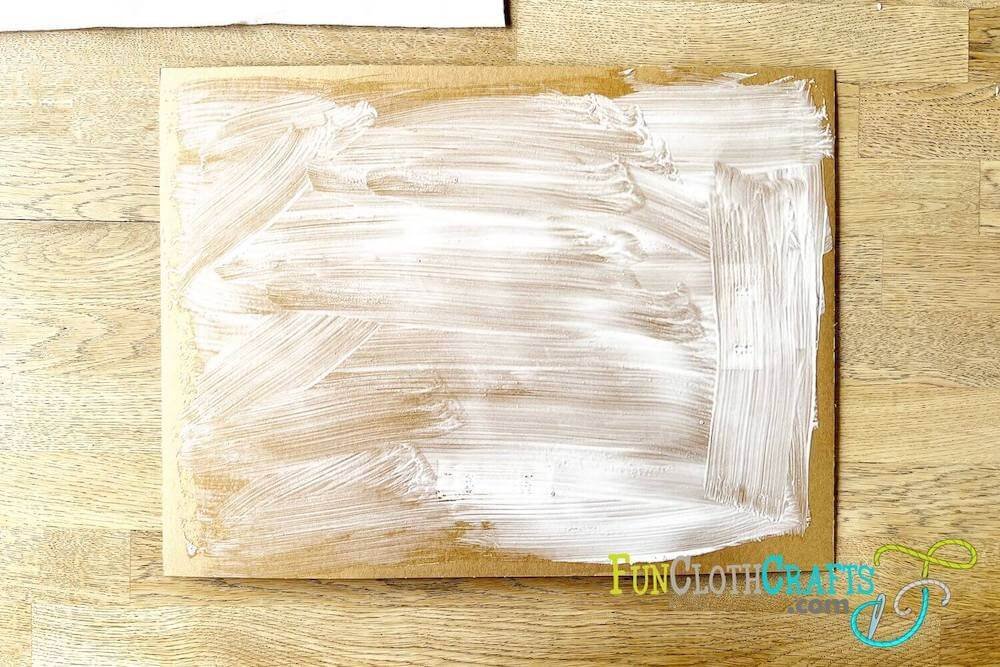
Add Glue to Cardboard - With a brush, spread a thin layer of glue on the cardboard.
Glue Felt to Cardboard- Place the felt on the cardboard and attach it to the complete area. If the felt didn’t adhere to the edges, add some more glue to attach it.
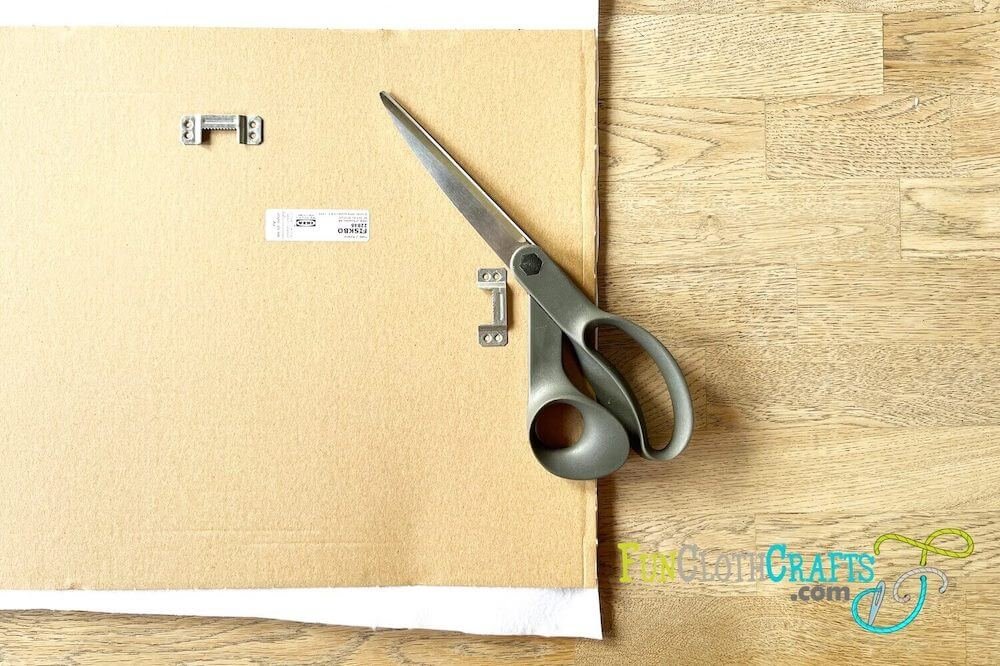
Cut off excess felt with scissors - flip the cardboard over and cut off the excess felt. Cut it close to the edge of the cardboard.
Place Cardboard with Felt in the Frame - Once your felt adhered, pick up the felted cardboard backing and gently press it back into the frame. Secure it properly with the clips.
STEP 1 - Remove Packaging, Plastic, Paper, and Cardboard from the Frame
STEP 2 - Cut Felt to Size
STEP 3 - Add Glue to Cardboard
STEP 4 - Glue Felt to Cardboard
STEP 5 - Cut off excess felt with scissors
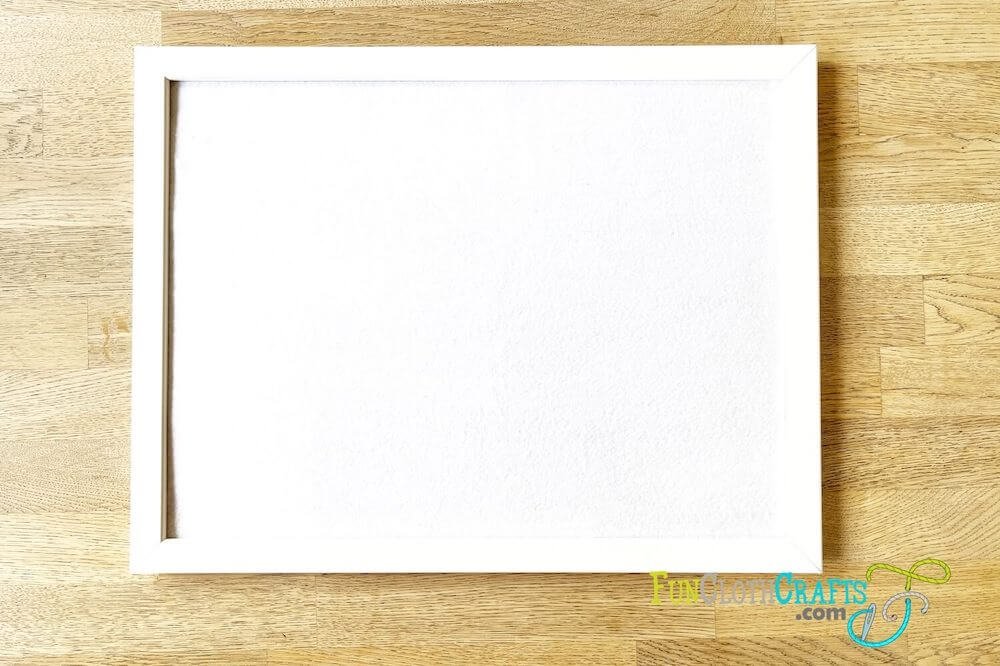
STEP 6 - Place Cardboard with Felt in the Frame

DIY Felt Board - It’s time to play
5. Can You Use Flannel for the Felt Board?
Yes, flannel is suitable for use as a felt board material. Felt is a soft, dense fabric made from natural or synthetic fibers, while flannel is typically a wool, cotton, or synthetic fabric with a brushed fuzzy surface. This brushed surface is made by napping, a process that utilizes a metallic brush to rub the fabric and raise up fine fibers for an even softer feel. Since flannel is fuzzy and felt has little loops the two bond temporarily together. This makes flannel suitable material for the storyboard base.
Is a Flannel Board the Same as a Felt Board?
Yes and no. They are both display boards with felt pieces on them, but the flannel board has flannel as its base, whereas the felt board has felt as its background material. Flannel is a material that has been used in display boards traditionally.
Said that people use the term felt board or flannel board interchangeably for these display boards.
6. Free and Paid Felt Board Patterns
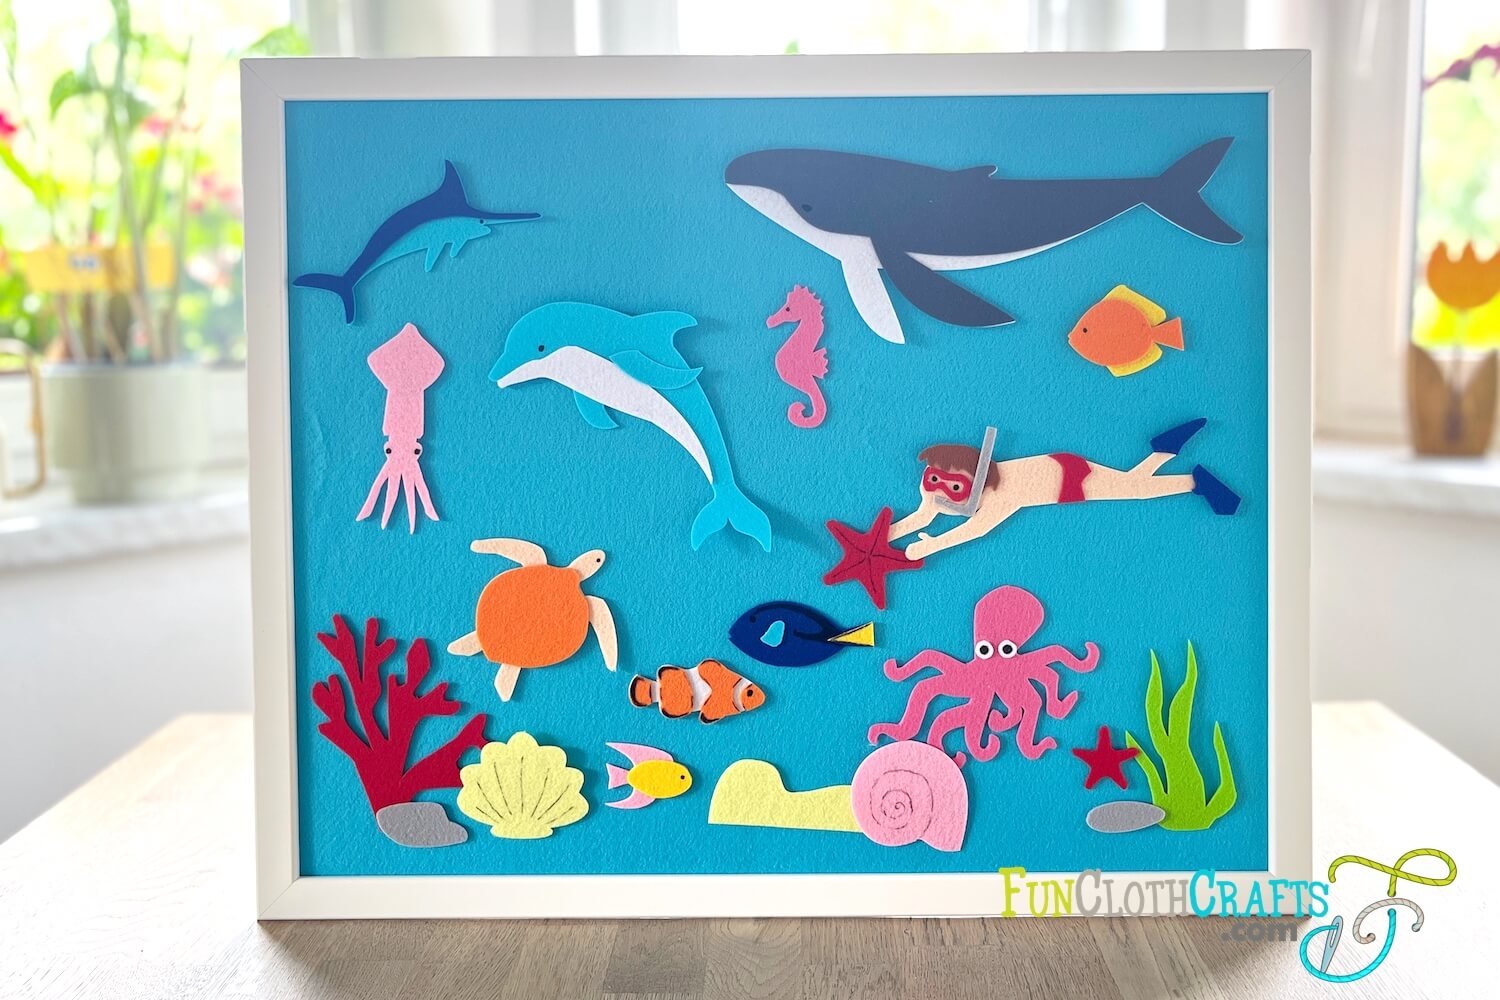
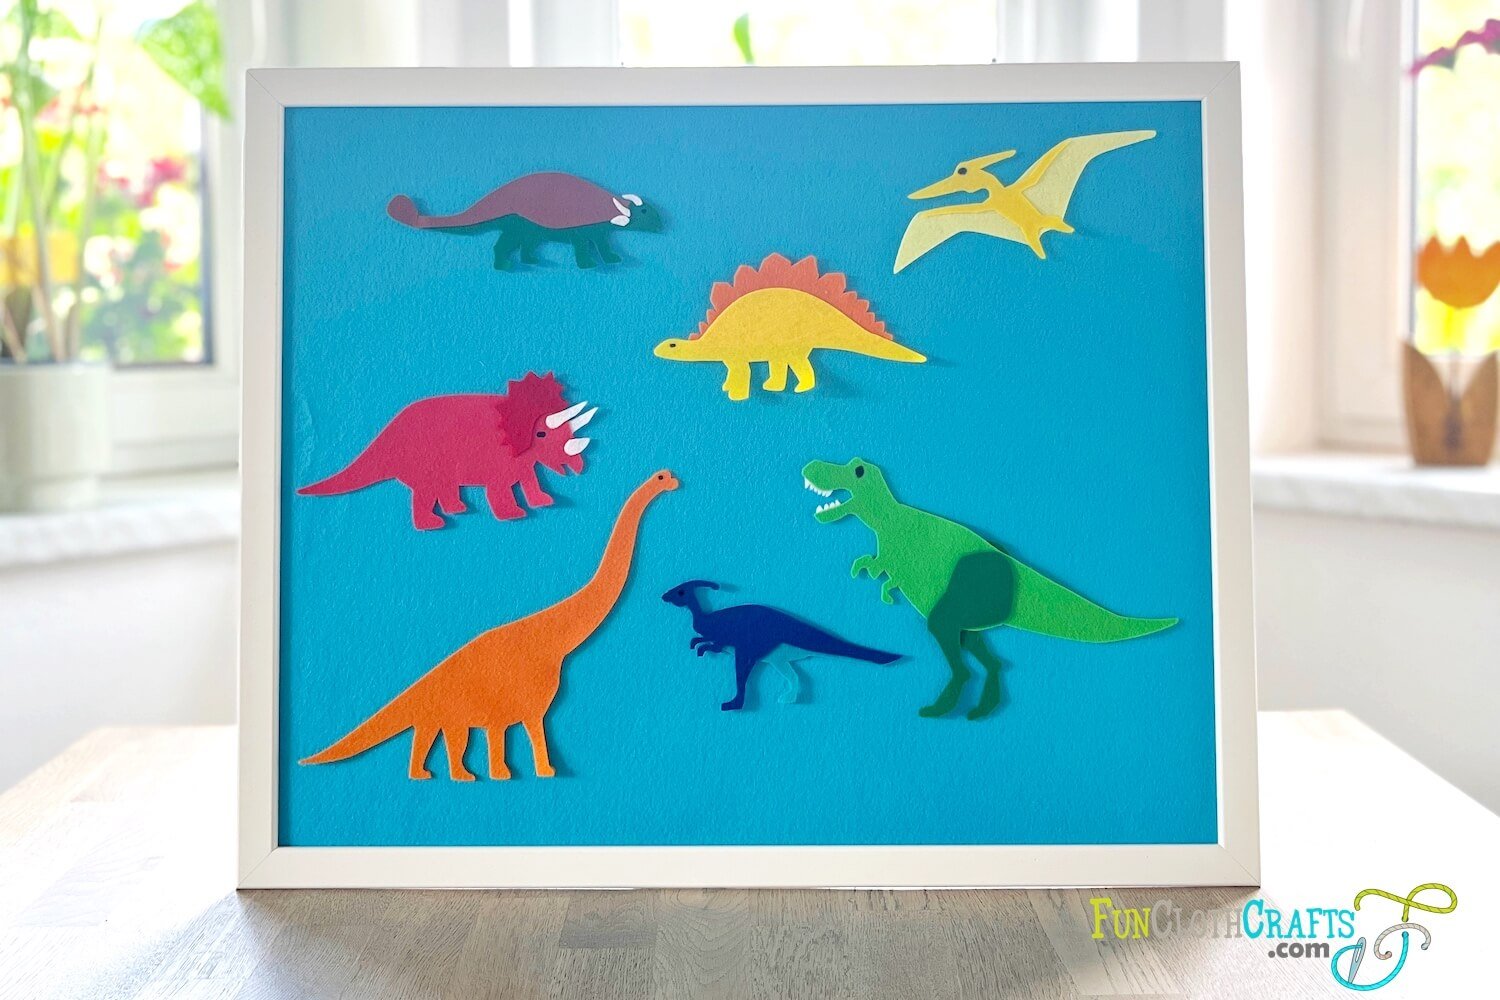
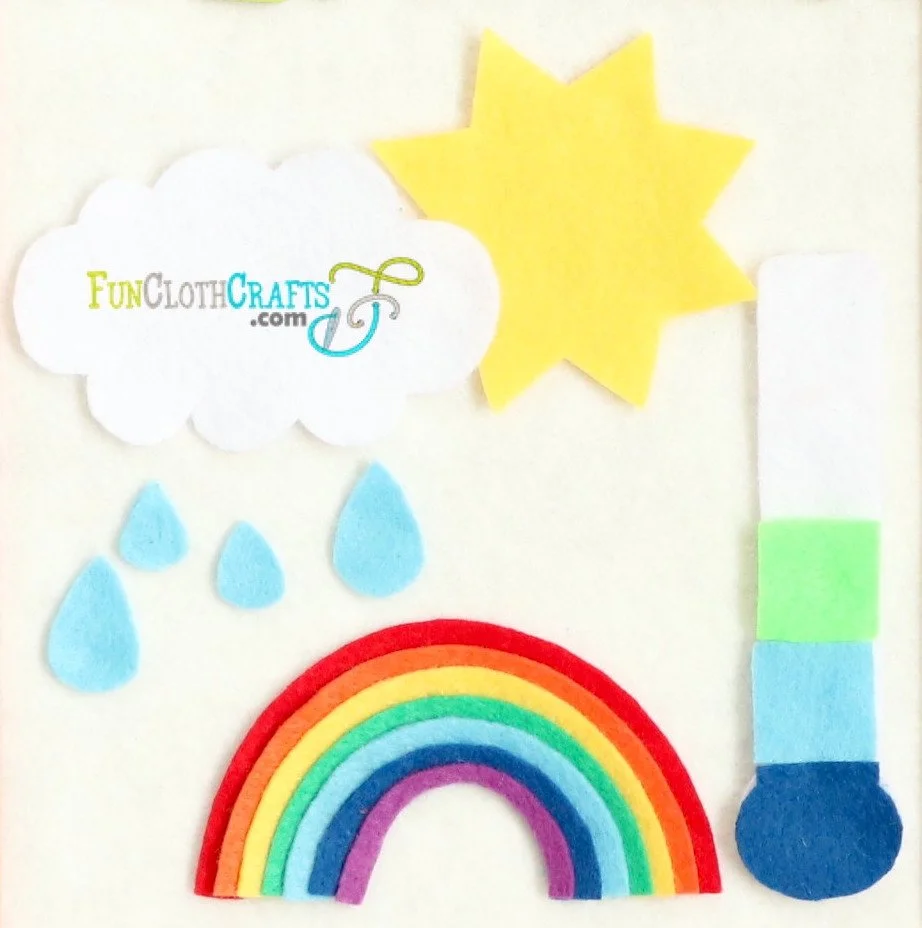
Felt board patterns allow children and adults alike to create engaging stories and scenes using colorful felt shapes. The beauty of felt board ideas is that they are limited only by your imagination. The good news is that you'll find both free and paid felt board patterns here. The free patterns offer from food felt board patterns to Halloween and Christmas sets. Exploring the paid felt board patterns, you'll find animal felt board sets and musical notes. Creating your felt board sets is easy and fun, and whether you choose the free or paid patterns, you will surely bring your kids' imagination to life.
Free Felt Board Patterns
![How Do You Make an Easy Felt Board (Flannel Board)? [Tutorial]](https://images.squarespace-cdn.com/content/v1/5f68de73f977627048ed931f/1688382493224-O20UKHLW9EJAG4VJRKOJ/How+do+you+make+a+felt+board+%7C+DIY+Felt+Board+with+blue+and+white+frame+%7C+DIY+felt+board+with+blue+felt+and+sign+Fun+Cloth+Crafts+%7C+Thumbnail.jpeg)
![DIY Felt Shape Activity for Toddlers [Free Pattern]](https://images.squarespace-cdn.com/content/v1/5f68de73f977627048ed931f/1686931316694-DXLCG1EZRX2SM0CO2KWR/DIY+Felt+Shapes+Activity+for+Toddlers+%7C+Creative+Play+with+Felt+Shapes+%7C+Felt+Shape+Activity+Games+%7C+Christmas+tree%2C+pizza%2C+flower%2C+tree+%7C+Thumbnail.jpeg)


![DIY Felt Gingerbread House [FREE PATTERN]](https://images.squarespace-cdn.com/content/v1/5f68de73f977627048ed931f/1638628805400-UC64GSISE3VR1YJ88M69/Felt+gingerbread+house+ornament+with+free+pattern+-+Thumbnail.jpeg)
![DIY Felt Board Halloween Pumpkin Faces [FREE PATTERN]](https://images.squarespace-cdn.com/content/v1/5f68de73f977627048ed931f/1632477456524-HDHDH4HXJCEU0HQFOFOW/Easy+Felt+Pumpkin+Craft+for+Kids+%7C+Felt+Board+Pumpkin+with+Free+Template+%7C+Felt+Board+Pumpkin+a+Boy+Playing+Thumbnail.jpeg)

7. Enjoy Your DIY Felt Board
Congratulations on creating your very own DIY felt board! This is an exciting project that opens up a world of endless possibilities. Now that you have your board ready, it's time to add some felt board sets. These sets will bring your felt board to life, providing opportunities for creativity, imagination, and learning. Watch as your little ones engage with the felt pieces, moving them around and creating their own narratives. They will have a blast and be learning essential skills such as storytelling, fine motor skills, and problem-solving, all through play. Encourage their curiosity, and watch as they explore different shapes, colors, and textures. So, prepare for hours of educational fun as your DIY felt board becomes an avenue for endless adventures. Enjoy the journey, and see how your kid learns and grows through the power of play.
Thank you for reading! What are your thoughts? Let me know if you find this article useful, and share your tips! It’s going to help a ton if you share the post on social media. You can tag me using #funclothcrafts.
Enjoy the felt crafting time :)
Feel free to join my mailing list! You’ll receive updates on new patterns, the latest sewing tips and tricks, and special promotions.
Let’s learn together!
XO, Anna
Make your own Gingerbread Man Felt Board. Find the free printable template for this felt Gingerbread man craft.